硬件
- any machine, 我用的 Apple Silicon Mac
软件
- git
- nodejs
步骤
- 首先安装 nodejs, 此版本的 hexo 需要 node22+。对于 mac 可用 homebrew 安装:
1
brew install node@22
- 安装 hexo:
npm install -g hexo-cli,然后按照 这里的教程 完成- 创建 hexo 项目
1
2
3
hexo init <folder-name>
cd <folder-name>
npm install- 使用下面的指令创建内容并开始写作
hexo new [layout] <title>例如hexo new "hello world" - 使用
hexo server来本地启动服务进行预览,使用hexo generate来生成静态文件
- 启用版本管理
- 创建 git 仓库,添加必要内容
.gitignore中可以忽略的东西:
1
2
3
4
5
6
7
# normal ignore files
.DS_Store
node_modules/
# hexo does not want these on the cloud
public/
db.json- 提交到 github
- 部署 github pages:创建 .github/workflows/pages.yml,内容如下
1
2
3
4
5
6
7
8
9
10
11
12
13
14
15
16
17
18
19
20
21
22
23
24
25
26
27
28
29
30
31
32
33
34
35
36
37
38
39
40
41
42
43
44
45
46
47
48
49
50
name: Pages
on:
push:
branches:
- new # default branch
jobs:
build:
runs-on: ubuntu-latest
steps:
- uses: actions/checkout@v4
with:
token: ${{ secrets.GITHUB_TOKEN }}
# If your repository depends on submodule, please see: https://github.com/actions/checkout
submodules: recursive
- name: Use Node.js 22
uses: actions/setup-node@v4
with:
# Examples: 20, 18.19, >=16.20.2, lts/Iron, lts/Hydrogen, *, latest, current, node
# Ref: https://github.com/actions/setup-node#supported-version-syntax
node-version: "22"
- name: Cache NPM dependencies
uses: actions/cache@v4
with:
path: node_modules
key: ${{ runner.OS }}-npm-cache
restore-keys: |
${{ runner.OS }}-npm-cache
- name: Install Dependencies
run: npm install
- name: Build
run: npm run build
- name: Upload Pages artifact
uses: actions/upload-pages-artifact@v3
with:
path: ./public
deploy:
needs: build
permissions:
pages: write
id-token: write
environment:
name: github-pages
url: ${{ steps.deployment.outputs.page_url }}
runs-on: ubuntu-latest
steps:
- name: Deploy to GitHub Pages
id: deployment
uses: actions/deploy-pages@v4
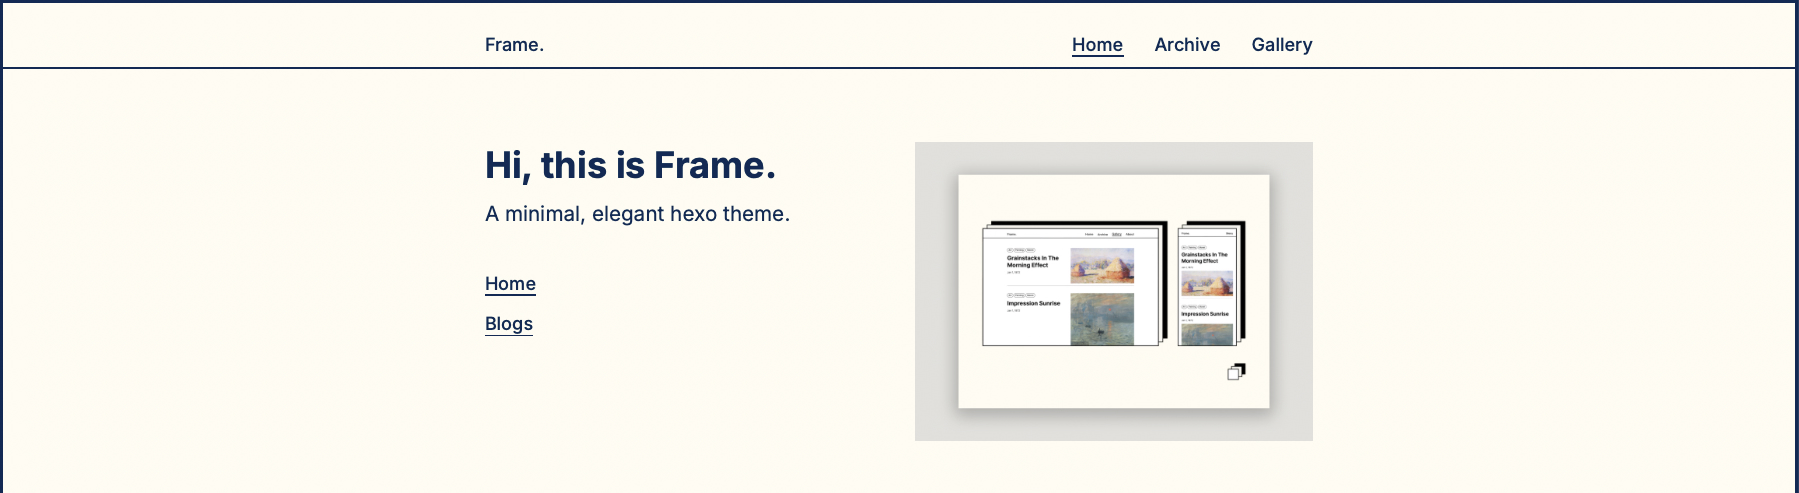
主题使用
本站使用这个主题: Frame
按照下面的步骤使用这个主题:
- 下载主题全部文件,放在 themes/frame 目录(直接 git clone 会为仓库引入子模块,行为奇怪徒增烦恼因此我只保留文件了)
_config.yml中,修改theme: frame
然后做了如下调整:
themes/frame/_config.yml:color_mode: classic
使用了如下功能:
- Gallery: 在每个想要添加到 gallery 的文章 front matter 添加
categories: [gallery]即可 - Featured image: 在每个想要添加 featured image 的文章 front matter 添加
featured_image: <image-path>即可 - Local Search:需要查看 这一页的介绍,需要安装
hexo-generator-searchdb插件。- 在项目根安装插件:
npm install hexo-generator-searchdb - 在
_config.yml中添加插件配置:
1
2
3
4
5
search:
path: search.xml
field: all
content: true
format: html- 在
theme/frame/_config.yml中添加搜索框配置:
1
2
3
search:
enable: true
... - 在项目根安装插件:
- 修改原主题的响应式布局:主要修改
themes/frame/source/css/media.styl:几个断点和布局宽度themes/frame/source/css/partials/profile.styl:个人信息栏的分栏逻辑断点